We live in a world overflowing with skincare products— most promising miracles, yet packed with harsh chemicals and heavy price tags. But what if you didn’t have to trade your health or wallet for glowing skin and beautiful hair?
The truth is—your kitchen already holds many ingredients that can work wonders for your skin and hair. From gram flour to aloe vera, these natural ingredients have been used for generations in home remedies. They’re not just effective; they’re safe, sustainable, and incredibly easy to use.
In this post, you’ll discover 7 proven DIY beauty tips that will help you glow naturally—no salon visits needed. These remedies are gentle, budget-friendly, and perfect for those looking to embrace clean, natural beauty routines.
Brighten Your Skin Naturally with This DIY Beauty Tip: Gram Flour & Milk Face Pack

Looking for a skin-brightening solution that’s simple, affordable, and actually works? Let’s talk DIY beauty tips with a scientific edge—and this one’s a timeless favorite that your skin will love. This natural remedy combines the skin-purifying properties of gram flour, the gentle nourishment of raw milk, and the glow-enhancing power of turmeric. It’s not just a grandma’s remedy—it’s backed by biology and trusted through generations.
Ingredients You’ll Need
- 2 teaspoons of gram flour (besan)
- 1 teaspoon of raw milk
- A pinch of turmeric powder
How to Make and Use the Face Pack
- In a clean bowl, mix gram flour, raw milk, and a small pinch of turmeric into a smooth, spreadable paste.
- Apply the mixture evenly on freshly cleansed skin, covering your face and neck.
- Let it sit for 15–20 minutes, or until it completely dries.
- Rinse off with lukewarm water, gently massaging in circular motions for added exfoliation.
- Pat your skin dry and apply a lightweight moisturizer to seal in hydration.
Why This DIY Face Pack Actually Works – The Science Behind It
This isn’t just a feel-good facial—it’s backed by real science.
- Gram Flour (Besan): Naturally rich in zinc and vitamins, gram flour acts as a gentle exfoliant. It removes dead skin cells, reduces excess oil, and tightens pores. Plus, its slightly coarse texture boosts microcirculation when used as a scrub.
- Raw Milk: Milk contains lactic acid, a natural alpha hydroxy acid (AHA), which helps brighten skin, promote cell turnover, and maintain hydration. It’s also rich in proteins and vitamins A, D, and B12, which nourish the skin barrier.
- Turmeric: This golden spice has strong anti-inflammatory and antioxidant properties thanks to the active compound curcumin. It helps reduce acne, lighten dark spots, and give your skin that natural glow.
Together, these ingredients create a powerful yet gentle remedy for dull, tired skin. It’s a perfect blend of exfoliation, nourishment, and natural glow.
How Often Should You Use It?
For best results, apply this DIY face pack 2 to 3 times a week. Avoid using it daily, as over-exfoliating can irritate your skin. Consistency is key—you’ll notice improved skin texture, a brighter tone, and a healthy glow after just a few uses.
Pro Tip:
Add a few drops of honey or rose water if you have dry or sensitive skin. For oily skin, a drop or two of lemon juice can help control excess oil.
This DIY beauty tip is an effortless way to pamper your skin using ingredients already in your kitchen, and the science behind it ensures you’re not just wasting time—you’re investing in your skin’s health.
Would you like more DIY beauty tips like this one?
Stop Hair Fall Naturally with This Powerful DIY Beauty Tip: Onion Juice Scalp Treatment

If you’re struggling with hair fall and looking for a chemical-free solution, this one’s a game-changer. The humble onion, often overlooked in your kitchen, can work wonders for your hair. This potent DIY beauty tip brings together traditional wisdom and modern science to help strengthen your roots and promote thicker, healthier hair. And no, you won’t smell like a salad—there’s a pro trick for that too!
Ingredients You’ll Need
- 1 medium-sized onion
- (Optional) A few drops of lavender essential oil
How to Make and Apply the Onion Juice Hair Treatment
- Peel and chop one medium-sized onion.
- Use a blender or grater to break it down into a pulp.
- Strain the pulp through a cheesecloth or fine sieve to extract the fresh onion juice.
- Apply the juice directly to your scalp, focusing on thinning areas.
- Gently massage it into your scalp using your fingertips for 5–10 minutes.
- Let it sit for 30–40 minutes.
- Rinse thoroughly with a mild, sulfate-free shampoo.
Pro Tip: Add a few drops of lavender oil to the juice before applying. It masks the strong onion smell and has added benefits for scalp health.
Why Onion Juice Works – The Science Behind the Remedy
Onion juice might not sound glamorous, but it’s backed by biology. Here’s why it’s effective:
- Rich in Sulfur: Sulfur is a crucial nutrient for producing keratin—the protein your hair is made of. It strengthens strands and stimulates the hair follicles.
- Improves Blood Circulation: The scalp massage combined with onion’s natural compounds helps boost blood flow, improving follicle health and encouraging growth.
- Antibacterial Properties: Onion juice combats scalp infections and dandruff, which are often responsible for hair thinning and breakage.
- High in Antioxidants: It contains quercetin, a powerful antioxidant that helps reduce oxidative stress in the scalp.
This simple treatment nourishes your scalp from the root and sets the stage for stronger, thicker, and more resilient hair.
How Often Should You Use It?
Apply the treatment twice a week for noticeable results in about 4 to 6 weeks. It’s a natural solution, so consistency matters. Don’t expect overnight miracles—but with regular use, your hair will thank you.
Looking for a Full Guide?
Want to learn more about the benefits and variations of using onion juice for hair care? Check out this in-depth guide on our site:
👉 Onion Juice for Hair: A Natural Remedy for Stronger, Thicker, Healthier Hair
It covers everything from detailed recipes to tips for reducing the smell and combining onion with other natural ingredients for even better results.
This DIY beauty tip is perfect if you’re dealing with hair fall, thinning, or just want to boost your hair’s natural volume and shine—no chemicals required. Keep it consistent, and the results will follow. Want more like this?
Get Softer, Kissable Lips Naturally: DIY Beauty Tip with Honey & Sugar Lip Scrub

Tired of dry, flaky, chapped lips ruining your vibe? Don’t reach for store-bought lip scrubs loaded with artificial stuff. Instead, go the natural route with this ultra-easy DIY beauty tip using just two ingredients from your kitchen—sugar and honey. It’s quick, cheap, and crazy effective at exfoliating dead skin and deeply moisturizing your pout.
Ingredients You’ll Need
- 1 teaspoon of sugar (preferably brown sugar for gentler exfoliation)
- ½ teaspoon of raw honey (go for organic if possible)
How to Make and Use This Lip Scrub
- In a small bowl, mix the sugar and honey until they form a thick, grainy paste.
- Using clean fingers or a soft toothbrush, apply the mixture onto your lips.
- Massage gently in circular motions for 1–2 minutes. Don’t press too hard—your lips are sensitive!
- Leave the scrub on for another minute to let the honey soak in.
- Rinse off with lukewarm water and pat your lips dry.
- Finish by applying a hydrating lip balm to lock in the moisture.
- Why This Natural Scrub Works – Backed by Nature & Science
- Sugar as an Exfoliant: Sugar is a natural humectant and a gentle exfoliator. Its fine crystals help lift away dry, flaky skin without damaging the delicate lip area.
- Honey as a Healer: Raw honey has powerful antibacterial and hydrating properties. It’s packed with enzymes and antioxidants that nourish, heal cracks, and lock in moisture.
- No Toxins, Just Results: Unlike commercial scrubs with synthetic ingredients, this combo is 100% edible, natural, and free from preservatives.
This scrub leaves your lips looking plump, smooth, and naturally pink—no lip gloss needed.
How Often Should You Use It?
Use this scrub twice a week for best results. Over-exfoliating can make your lips sensitive, so stick to the sweet spot—literally and figuratively!
This simple DIY beauty tip is a total game-changer, especially if you wear lipstick regularly or live in dry climates. Want lips that look as soft as they feel? This scrub is your go-to secret weapon.
Say Goodbye to Dark Circles Naturally: DIY Beauty Tip with Potato Juice
Dark circles can be stubborn, and while concealers can hide them temporarily, wouldn’t you rather get rid of them for good? Here’s a natural, science-backed DIY beauty tip that actually works—potato juice. Yep, the same veggie you fry is loaded with skin-brightening properties that can help you achieve fresher, more awake-looking eyes. This method is easy, quick, and totally gentle for the delicate under-eye area.
Ingredients You’ll Need
- 1 raw potato
How to Make and Use the Treatment
- Peel and grate the raw potato using a fine grater.
- Squeeze the pulp through a clean cheesecloth or strainer to extract the fresh potato juice.
- Soak two cotton pads in the juice until fully saturated.
- Lie back and place the pads under your eyes, covering the dark circles.
- Let them sit for 10–15 minutes.
- Remove and gently rinse the area with cool water. Pat dry with a soft towel.
Why It Works – The Science Behind Potato Juice for Dark Circles
- Natural Enzymes: Potatoes contain an enzyme called catecholase, which has natural skin-lightening properties. It helps reduce pigmentation and even out skin tone.
- Antioxidants: Loaded with vitamin C, B-complex, and minerals like potassium, potato juice nourishes and soothes tired eyes.
- Anti-Inflammatory Effect: The cool temperature and anti-inflammatory compounds in potato help reduce puffiness and swelling around the eyes.
- Gentle Astringent: It also tightens the skin slightly, reducing the appearance of fine lines and making eyes appear more awake.
Together, these benefits make potato juice a natural powerhouse for combating tired eyes, puffiness, and dark shadows.
How Often Should You Use It?
Apply this remedy every alternate day for best results. You should start to notice a visible reduction in darkness and puffiness after two weeks of consistent use.
This DIY beauty tip is a lifesaver if you’re constantly dealing with dark circles—whether it’s from late nights, screen time, or just genetics. It’s cheap, natural, and requires zero harsh chemicals. Want eyes that look as fresh as you feel? Give this trick a try!
Tone and Refresh Your Skin Naturally: DIY Beauty Tip with Cucumber & Rose Water Toner
Let’s face it—we all want skin that feels cool, fresh, and hydrated all day long. And that’s exactly what this DIY beauty tip delivers. Enter the Cucumber-Rose Toner—a soothing, lightweight mist that not only tones your skin but also leaves you glowing and refreshed. It’s the kind of natural skincare that feels as good as it looks, and the best part? You can make it in minutes with just two ingredients.
Ingredients You’ll Need
- 1 fresh cucumber
- 2 tablespoons of rose water (organic if possible)
How to Make and Use the Toner
- Peel and chop the cucumber into small pieces.
- Blend the cucumber in a food processor or blender until smooth.
- Strain the mixture using a muslin cloth or fine sieve to extract pure cucumber juice.
- Add 2 tablespoons of rose water to the juice and mix well.
- Pour the mixture into a clean spray bottle.
- Store in the refrigerator for up to 5–7 days.
- After washing your face, spritz the toner all over your skin or apply with a cotton pad.
Why This Toner Works – Nature Meets Skin Science
- Cucumber: Known for its high water content, cucumber delivers deep hydration and instant cooling. It also contains vitamin C and caffeic acid, which soothe skin irritation, reduce inflammation, and minimize puffiness.
- Rose Water: A time-tested beauty favorite, rose water is naturally astringent and helps tighten pores, balance pH, and reduce redness. It’s also rich in antioxidants that support skin regeneration.
- Combined Benefits: This toner is especially great for sensitive, oily, or acne-prone skin, offering a gentle cleanse and hydration without clogging pores.
The refreshing scent, cooling effect, and toning power make it a skincare essential for any season—especially summer.
How Often Should You Use It?
Use this toner daily, both in the morning and evening, right after cleansing. It preps your skin for better absorption of serums and moisturizers while keeping it fresh and hydrated throughout the day.
This is more than just a toner—it’s your new skincare BFF. Lightweight, natural, and free of alcohol or harsh chemicals, this DIY cucumber-rose toner is proof that skincare doesn’t have to be complicated to be effective.
Deep Condition Dry, Frizzy Hair Naturally: DIY Beauty Tip with Banana-Yogurt Hair Mask
Frizzy, dry, lifeless hair? We’ve all been there. But instead of loading your strands with chemical conditioners, how about treating them to a deliciously creamy, nutrient-rich DIY hair mask that smells good and feels even better? This Banana-Yogurt Hair Mask is a miracle in a bowl—blending softness, hydration, and shine in one natural, easy-to-make treatment. If you’ve been searching for a way to bring your hair back to life, this DIY beauty tip has your name all over it.
Ingredients You’ll Need
- 1 ripe banana (the riper, the better)
- 2 tablespoons of plain yogurt
- 1 tablespoon of honey
How to Make and Use This Deep Conditioning Hair Mask
- Peel and chop the ripe banana.
- In a blender, combine banana, yogurt, and honey until the mixture is smooth and lump-free.
- Pro tip: Make sure there are no banana chunks—your hair will thank you when it’s time to rinse.
- Section your dry or damp hair and apply the mask generously from root to tip.
- Once applied, cover your hair with a shower cap or wrap it in a warm towel.
- Leave the mask on for 30 minutes.
- Rinse thoroughly with lukewarm water and wash with a mild shampoo.
Why It Works – The Science of Hair Nourishment
- Banana: Packed with potassium, natural oils, and vitamins A, B6, and C, bananas deeply moisturize hair, tame frizz, and improve elasticity.
- Yogurt: Rich in protein and lactic acid, yogurt strengthens hair, reduces dandruff, and conditions the scalp.
- Honey: A natural humectant, honey seals in moisture, enhances shine, and smooths the hair cuticle, making your strands look sleek and healthy.
Together, these ingredients repair damage, soften texture, and restore your hair’s natural luster—all without chemicals or salon visits.
How Often Should You Use It?
For best results, apply this deep conditioning treatment once a week. Consistent use can help restore hydration, reduce split ends, and make your hair more manageable and bouncy over time.
This simple yet powerful DIY beauty tip is like a spa day for your hair. It’s natural, cost-effective, and most importantly—it works. Give it a try and watch your hair transform from dry and dull to silky and shiny.
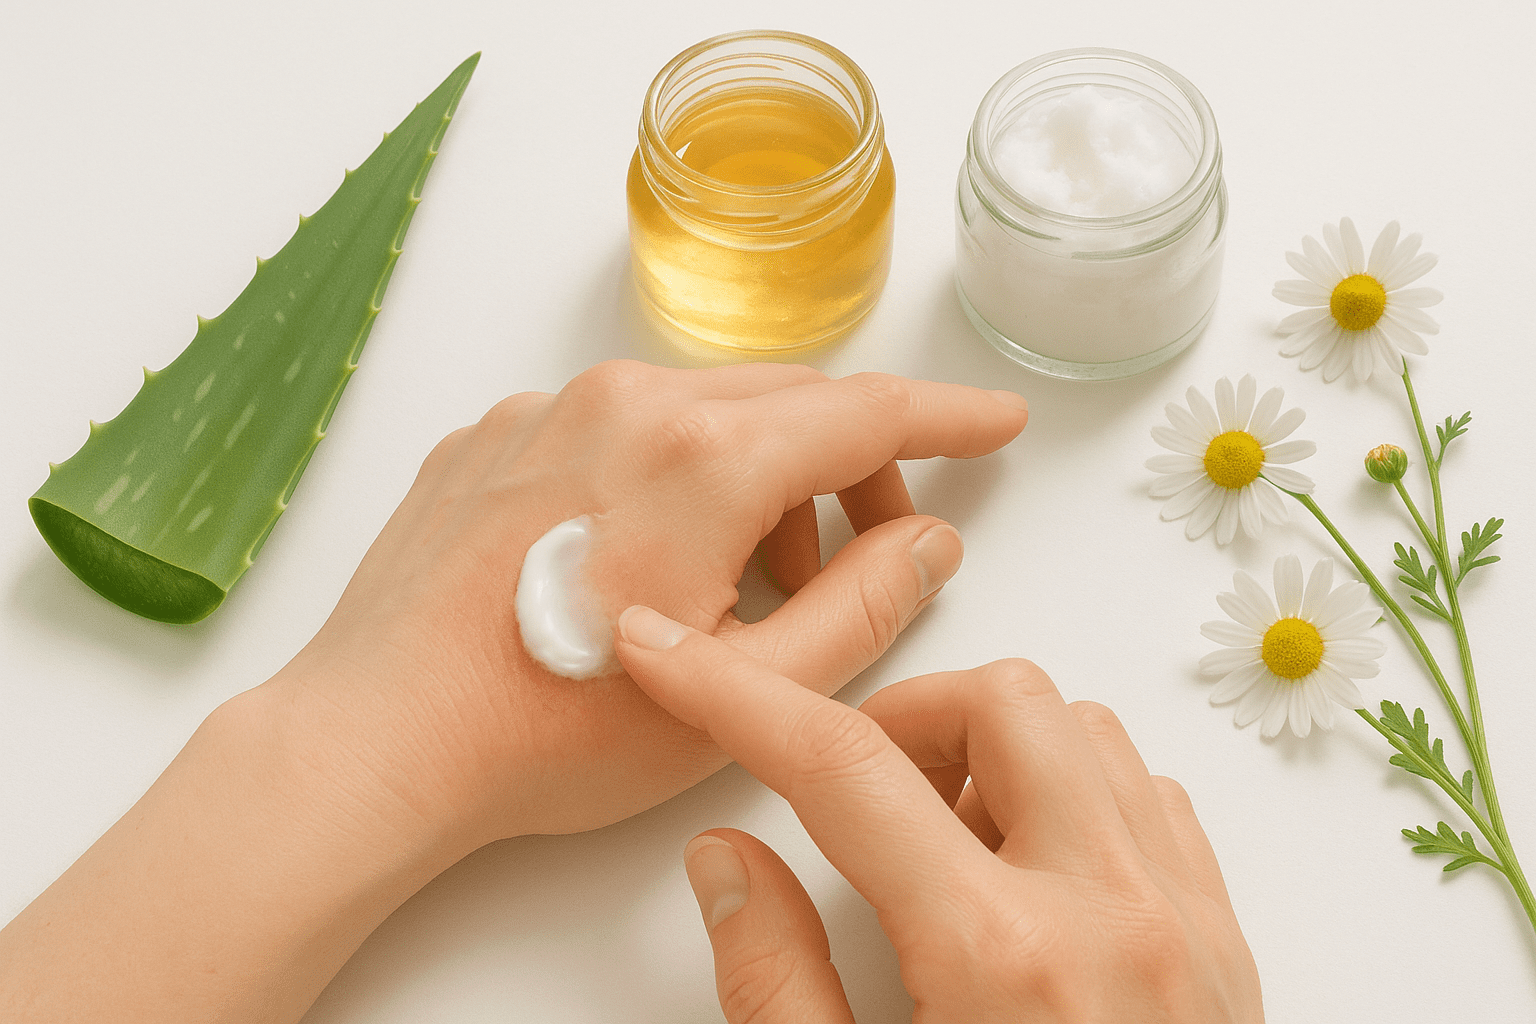
Soothe Acne Naturally: DIY Beauty Tip with Aloe Vera & Tea Tree Gel
Acne can be frustrating, painful, and a serious confidence-killer. While over-the-counter products can dry out your skin or cause side effects, this DIY beauty tip offers a gentler, more natural way to manage breakouts—using the skin-calming duo of aloe vera and tea tree oil. This simple yet effective gel is packed with antibacterial and anti-inflammatory properties that help you zap zits and soothe redness without harming your skin.
Ingredients You’ll Need
- 2 tablespoons of fresh aloe vera gel (scraped from the leaf or use 100% pure store-bought gel)
- 2–3 drops of tea tree essential oil
How to Make and Use This Acne Gel
- In a clean bowl, mix fresh aloe vera gel with 2 to 3 drops of tea tree oil.
- Stir until well combined.
- Apply the gel directly to acne-prone areas or use it as a spot treatment on active breakouts.
- Leave it on overnight or for a minimum of 30 minutes.
- Rinse with lukewarm water if applied during the day or leave it overnight for deeper healing.
Store any leftover mixture in a clean, airtight container in the fridge for up to 5 days.
Why It Works – Backed by Science & Nature
- Aloe Vera: Known as nature’s skin soother, aloe vera is rich in vitamins A, C, and E, as well as enzymes that help reduce redness, inflammation, and swelling. It’s cooling and hydrating—perfect for angry, irritated skin.
- Tea Tree Oil: A natural antibacterial and antifungal agent, tea tree oil contains terpinen-4-ol, which has been scientifically proven to reduce acne-causing bacteria on the skin. It also helps unclog pores and dry out pimples—gently.
When combined, aloe vera keeps your skin calm and hydrated while tea tree oil targets the root cause of acne—bacteria and inflammation.
How Often Should You Use It?
Use this treatment daily or as needed, especially during breakouts. It’s safe enough for most skin types but always do a patch test before using tea tree oil to avoid irritation.
This DIY beauty tip is a lifesaver for anyone tired of harsh chemicals and aggressive acne treatments. It’s gentle, natural, and totally effective—perfect for restoring balance to troubled skin.
Conclusion: Embrace Nature for True Beauty
You don’t need a cabinet full of high-end products or a complicated 12-step routine to look and feel radiant. Sometimes, the best-kept beauty secrets are already sitting in your kitchen—simple, affordable, and surprisingly powerful. These DIY beauty tips aren’t just trendy hacks; they’re time-tested remedies backed by natural science.
Whether you’re struggling with stubborn acne, frizzy hair, dark circles, or just want to glow up your skincare routine—these natural treatments are here to help. From the cooling relief of cucumber-rose toner to the hydrating magic of a banana-yogurt hair mask, each tip is designed to give you real results without harsh chemicals or expensive salon visits.
What makes them even more amazing? You control exactly what goes on your skin and hair. No preservatives, no synthetic fragrances—just pure, skin-loving goodness.
So next time your skin acts up or your hair needs some TLC, skip the drugstore aisle and try one of these remedies. Stick with them, stay consistent, and you’ll see the difference. Nature always knows best.
Frequently Asked Questions (FAQs)
Q1: Are these remedies safe for all skin types?
A: Most of these are gentle and suitable for all skin types, but if you have very sensitive or allergy-prone skin, always do a patch test before applying the remedy to larger areas.
Q2: Can I store these DIY products?
A: While it’s always best to use freshly prepared remedies, some like the cucumber-rose toner and aloe vera gel mix can be stored in the fridge for 3–4 days in airtight containers. Avoid storing anything with fresh fruit or dairy for more than a day.
Q3: Will I see immediate results?
A: Natural remedies aren’t overnight miracles, but with consistent use (2–4 times a week for 2–4 weeks), most people notice real improvements in texture, tone, and hydration.
Q4: Can I use makeup after applying these remedies?
A: Absolutely! Just make sure you rinse and tone your skin properly, and let any natural mask or serum fully absorb before applying makeup.
Q5: What’s the best way to include these in a routine?
A: Start small—pick 1 or 2 remedies that match your top concerns. Use them consistently for at least a month, then adjust as your skin or hair needs change.